FreeCRM
Documentation
Campaigns in FreeCRM
Campaigns in FreeCRM are series of timed communications sent to individuals, allowing for targeted and personalized engagement with your contacts. This guide will walk you through the process of setting up a campaign.
Creating Content Templates
Before creating a campaign, you first need to create the content templates that will be sent as part of the campaign. Content templates can be created in the Content Templates screen, accessible from the Settings menu.
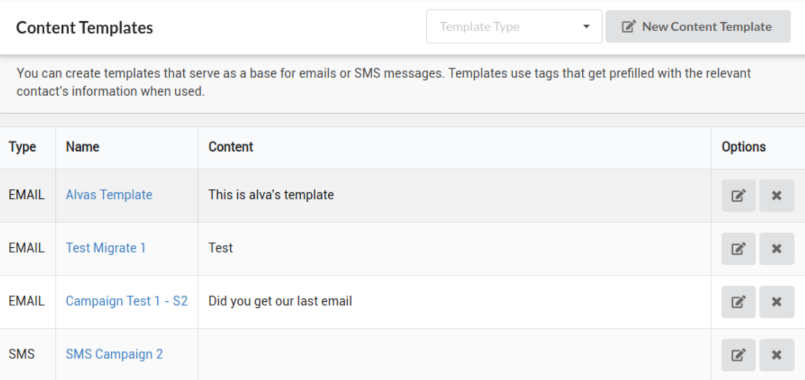
These templates can contain tags that will be replaced with data from the records when the campaign is executed. To input a tag, simply type the ‘@’ character, and a dropdown menu will appear to help you complete the tag.
Attaching Files
Email templates can carry attachments. In the template editor, the Attachments field searches your documents — anything you pick here is sent to every recipient of the template. The document’s current file is what goes out, so replacing a file in the Documents area updates what future sends deliver, without touching the template.
Attaching Each Contact’s Own Document
Sometimes the file you want to send is different for every recipient — a quote, a report, a signed agreement, or a PDF that your website generated for that particular person. Rather than building one campaign per contact, a template can attach the recipient’s own document, chosen when the message is sent.
Open an email content template and expand the Recipient documents section, then click Add rule. A rule describes the document to look for on each contact:
- Tagged: one or more tags the document must carry. Tags are matched regardless of capitalisation, and a tag that doesn’t exist matches nothing.
- Match: only appears once you’ve entered more than one tag. Choose whether the document needs any of those tags or all of them.
- File type: restrict to PDFs, images, Word documents or spreadsheets. Leave it on Any file type to accept anything.
- Wait for this document before sending: see When the contact has no matching document below.
- Default document: the file to send when the contact has nothing of their own that matches.
Under each rule, FreeCRM writes out in plain language what it will do, so you can check its effect before saving:
Attaches the contact’s most recent PDF document tagged “quote”, or “Standard price list” if they have none.
You can add as many rules as you need. Each one is resolved separately and contributes at most one attachment, so a template can send, say, the contact’s latest quote and their latest signed agreement.
Which document gets picked
FreeCRM only considers documents that are linked to that contact. A document becomes a contact’s own when it is assigned to their record — by uploading it against the contact, by relating an existing document to them, or through the API. Documents that merely sit in your Documents area unlinked, are linked to a different contact, or have been moved to the Bin are never picked up.
Where a contact has several documents matching the same rule, the most recently created one wins. This is what makes the feature work well for files that get regenerated: the newest version is always the one that goes out.
When the contact has no matching document
This is the important choice on each rule, and it is controlled by the Wait for this document before sending checkbox.
Left unticked (the default), the message always goes out. If the contact has no matching document, the rule’s Default document is attached instead. If you haven’t set a default, the email is simply sent without that attachment. Use this when the personalised file is a nice-to-have and the message still stands on its own.
Ticked, the message is held back. The contact stays in the campaign, and the send is marked Pending with the reason “Waiting for the recipient’s document”. FreeCRM re-checks on every campaign run and delivers the message on the first run after the document appears. Nothing is lost and nothing is sent half-finished. Because the send was never actually attempted, a held message doesn’t count against the retry allowance that would otherwise eventually drop a contact from the campaign, and the contact does not move on to the next scheduled message until this one has been delivered.
Since a required rule never falls back, the Default document field is hidden once you tick the box — it would promise something the send won’t do.
Tip: a required rule is effectively a gate on the campaign. It is the right choice when the attachment is the message (“here is your certificate”), and the wrong one when the contact might never receive that document at all, as those contacts would wait indefinitely.
Notes and limits
- Recipient document rules apply to email templates used in campaigns. The section is hidden on SMS and WhatsApp templates, which carry a single media document at most, and one-off emails sent from the composer are not affected.
- Rules are evaluated fresh for every recipient at the moment of sending, not when the campaign is set up.
- A rule set through the API accepts two further filters that aren’t exposed in the editor:
folder_id, to restrict a rule to a single documents folder, andtitle_contains, to require a substring in the document’s title. - Linking a document to a contact can also be automated — see Assign a document to a specific record in the API documentation.
Setting Up a Campaign
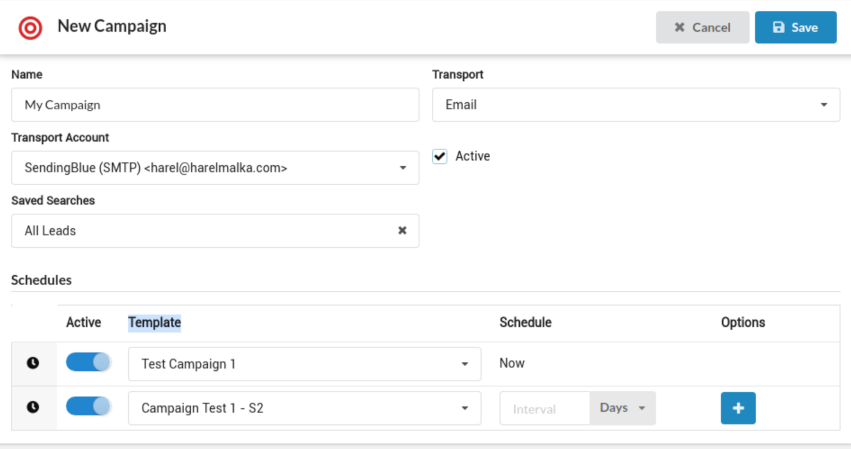
When creating a campaign, you need to decide if this will be an email or SMS campaign. Based on this, you will select a transport method (how the content will be delivered). For email campaigns, this would be an outgoing email account, and for SMS, a previously purchased mobile number.
Adding Subscribers
Campaigns can have subscribers added to them explicitly, or they can use a previously saved search filter to include individuals who meet the filter’s criteria. This feature allows the campaign’s subscriber list to be dynamic, as contacts can fall in and out of the filter at any time, based on their current data.
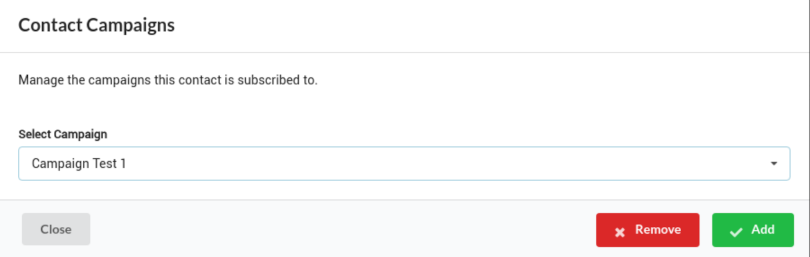
To add a contact explicitly, click the campaign icon in the contact toolbar:

and select the campaign to add to:
Scheduling Your Campaign
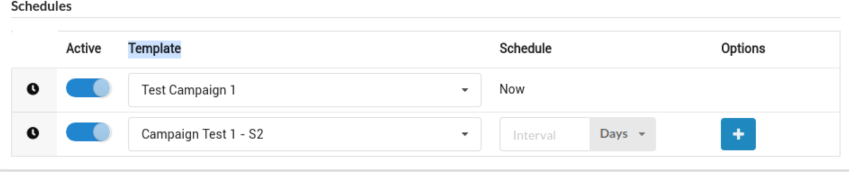
The final step in setting up a campaign is scheduling. This sets the timing for the message delivery. For example, you could choose to send an email when a user joins the campaign (either by explicit subscription or by matching the filter criteria), followed by a different piece of content two days later. Each schedule’s timing is considered from the time of the previous schedule. If the first schedule is sent today and the next one is set to 3 days from now, it will be delivered 3 days from the time the first was sent.
Using campaigns in FreeCRM, you can automate and personalize your communication, allowing for a more efficient and tailored approach to your engagement strategies.