FreeCRM
Documentation
- Welcome
- Data Templates
- Multi Templates
- Filters and Views
- Quick Search
- The Bin
- Board View
- Importing Data
- Users and Roles
- Telephony
- UK Number Registration
- Scheduling and Booking Pages
- Video Conferencing
- Email Accounts
- Automation
- Campaigns
- Email Template Library
- Invoices
- Forms
- Embedding Forms
- Landing Pages
- DocuSign
- AI
- Custom UI
- API
Data Templates in FreeCRM
Data templates in FreeCRM are a crucial feature that allows you to define and customize how your data is structured and presented in your records. A new account is initially assigned a default set of templates, which are designed to cater to most general business requirements.
In the future, we’ll be introducing additional templates to better serve specific industries or verticals, such as automotive or real estate.
Managing Data Templates
To access and manage your data templates, you will need to navigate to the Configuration screen, which is located in the Settings area of the application.
Once you’re on the Configuration screen, you’ll be able to:
-
View all of your data templates: These are the templates currently available for you to use and customize. They represent different types of records that you might want to create and manage in your CRM.
-
Select a data template to edit: By clicking on a data template, it will open a form with additional controls. This allows you to modify the existing fields or add new ones as per your specific needs.
-
Rearrange fields: The fields within each template are fully draggable and can be rearranged to fit your preferred layout and order of importance. This flexibility ensures that the most crucial data for your operation is always where you need it to be.
Remember, any changes you make in the Configuration screen will be reflected in the corresponding records in your CRM. This means that customizing your data templates allows you to create a CRM experience that’s perfectly tailored to your business needs.
Adding Fields to Data Templates in FreeCRM
The ability to add and customize fields in your data templates allows you to capture precisely the data you need for your business operations. FreeCRM provides a variety of field types that can be added to your templates:
-
Text Fields: These fields allow you to input any form of text. You can select it as a single or multi line input.
-
Date and Time Fields: These fields let you record specific dates and times. You can select to include those in the calendar as well.
-
Lookup Fields: These fields create a link to another record in your CRM. They are useful for establishing relationships between your data, such as linking a contact to a company or an event to a project.
-
Option Fields: Option fields allow you to define a predetermined list of options that can be selected when filling out a record. You can choose whether the options appear as a dropdown list or as a checkbox selection. This type of field is great for categorizing your data or logging multiple-choice responses.
-
Address Fields: Address fields are formatted to conveniently store structured address information. They can be beneficial when managing contact or company information, especially if you require a comprehensive view of geographic data.
-
Auto Increment Fields: These fields include an automatically rising counter for each new record created. This is useful for automatically generating unique IDs, numbers, or reference codes for your records.
-
External Link Fields: These fields are designed to store URLs or other external links. This can be helpful when you want to associate a record with an external webpage, document, or other online resources.
-
File Fields: A named place on the record for one file — a passport scan, a signed contract, a certificate. The file is kept as one of the record’s documents. See File and image fields.
-
Image Fields: A picture of the record itself — a property photo, a signature specimen — shown as a thumbnail that opens full size. See File and image fields.
Calculated fields
Some fields are worked out by FreeCRM rather than filled in by you. They appear on the record like any other field, but they cannot be edited, imported into, or set by an automation, and they are not offered in the “Add Field” list.
-
Record age: how many whole days ago the record was created. Every contact, company, deal, case, task and product has one. It is available as a grid column, as a filter (“record age is at least 30 days”), and as a sort — sorting by record age oldest-first is the same as sorting by creation date.
Record age is worked out fresh every time it is read, so it is always current. Because it is a real filter, it works everywhere filters do: save a search on it, use that search to target a campaign, or build an automation rule around it.
Time-based automation. Record age makes a new kind of rule possible: one that runs because time has passed rather than because someone edited a record — “when a lead has been sitting untouched for ten days, create a task to chase it”. See Time-based automations.
A note on imported records: record age counts from the record’s creation date, and for imported records that is the date of the import unless you mapped the original creation date during the import. If you are migrating from another CRM and record age matters to you, map the original date — see Importing data.
File and image fields
Both let a record hold a file of its own, under a name you choose. They differ in what the file is for.
File fields
A file field is a named slot on the record for a single file: “Passport”, “Signed contract”, “Insurance certificate”. Upload a file into it when you add or edit the record, and it becomes one of the record’s documents:
- it appears on the record’s Documents tab, marked with the field it fills (for example Passport field), so it is clear why it is there;
- it is filed in a Record Files folder in Documents, titled with the field’s label, and downloads under the file’s original name;
- it can be used like any other document — attached to an email, tagged, found in search, or sent for signature.
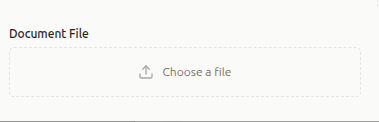
Replacing the file. Choose Change and upload a new file. The document stays the same document and its file is swapped, so anything that already points to it — an email that attached it, a link in a note — now gets the new file.
Removing the file. Choose Remove. The field’s document existed only to fill the field, so removing it deletes the document; you are asked to confirm first. (A document that was put into the field from your existing documents, through the API, is only taken out of the field and stays on the record.)
If the document is deleted or moved to the Bin from Documents, the field is simply empty.
Privacy. A file is exactly as private as its record. On a private record only the people who can see the record can see the file, and if the record’s privacy changes later, the file follows.
Field settings. As well as the usual settings, a file field can be limited to certain kinds of file — images, videos or documents (PDF, Word, Excel, PowerPoint, text and the like); leave all unticked to accept any file — and given a maximum file size. Without one, the platform limit of 100MB applies, and a field cannot go above it. A required file field must have a file before a new record can be saved.
Image fields
An image field holds a picture of the record — a photo of a property, a vehicle, a signature specimen. It is not a document: it does not appear on the Documents tab and cannot be emailed or signed.
On the record, the image is shown as a thumbnail. Click it to open it full size; if the record has several image fields, the arrow keys move between them, and Escape (or a click outside the picture) closes it.
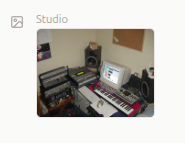
JPEG, PNG, GIF, WebP and BMP images are accepted. SVG files are not. Each image may be up to 10MB, or less if the field sets its own limit. Replacing or removing an image deletes the previous one.
The contact and company photo — the picture next to the record’s name — is not an image field and works as it always has.
In grids, exports and search
- Grids: a file field can be shown as a column holding the file’s name (click to download); an image field as a small thumbnail that opens full size.
- Exports: the cell holds the file’s name only. No download link is exported — a link in a spreadsheet would travel further than the record does.
- Search: the contents of files and images are not searched, so the Searchable option is not offered for these fields. (A file field’s document can still be found by its title through Quick Search, like any document.)
For API users
Record create and update endpoints accept multipart/form-data: send the file under the
field’s name, alongside the record’s other values. Sending null for the field empties it.
Clients that cannot post files — Zapier, for example — can put one of the account’s
existing documents into a file field instead:
{"passport": {"document_id": "9b2f…"}}
A record read back from the API holds a summary of each file (name, size,
content_type and a download url) and of each image (name, width, height, and
url / thumb_url links that expire after an hour — read the record again for fresh ones).
Posting the summary back unchanged leaves the file alone.
Adding a field to a data template is straightforward:
Open the Settings screen:
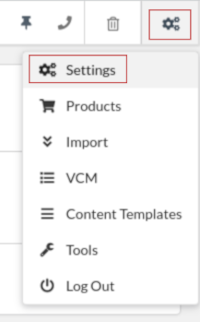
and select the Configuration tab. There you can select any of the data templates from the left:

The template screen looks like a regular record form, with added controls:

Click on the “Add Field” button or option, and choose the type of field you wish to add from the provided list:

Configure the field settings. Each field type offers specific controls, including:
-
Required: You can choose whether a field must be filled out for a record to be saved. This is useful for data that you absolutely need for each record.
-
Display Label: This is the name of the field as it appears in your records. You can choose a name that best describes the data the field is intended to capture.
-
and any other specific setting relating to the field itself. For example, option fields will let you enter the selection options as well, or Lookup fields will let you select to the lookup record type:

After you’ve added and configured a field, it will appear in all records based on that template. Remember, you can drag and drop fields to rearrange them within your template. This ensures that your data is always presented in the way that makes the most sense for you.
Customizing your data templates with additional fields enables you to capture a wide range of data, ensuring that your CRM is a perfect fit for your specific business needs.
Additional configuration
From the configuration screen you can also select a few other global configuration options. For example you can control the list of deal stages:
